MIL-PRF-1/1670D
NOTES:
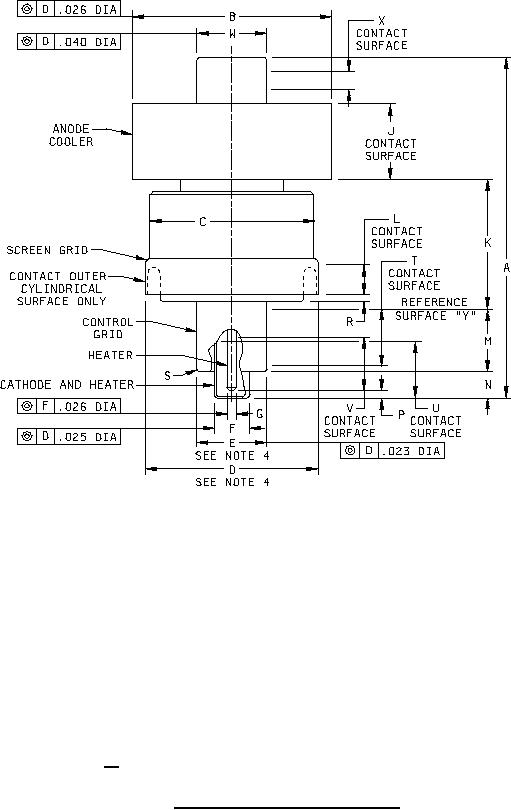
1. The eccentricity values shown shall be considered as maximum values, and shall be checked on a conformance
Inspection, part 3 (basis), with the provisions of note 5 applicable.
2. The tube shall be rotated on diameter D when eccentricity is being measured.
3. Surface Y shall be perpendicular to the measuring platform when eccentricity is being measured.
4. Average diameter of E shall be as noted, and may be out of round a total of .006 inch (0.15 mm). Average diameter of F
shall be as noted, and may be out of round .006 inch (0.15 mm).
5. Dimensions listed under conformance Inspection, part 3, shall be checked twice yearly, using a sample of 10 tubes with no
failures allowed. In case of a sample failure, the failing dimension(s) shall become conformance Inspection, part 2,
acceptance level of 6.5 (see 13/), for three consecutive successful submissions, at which time the test may revert to the
periodic-check test basis.
FIGURE 1. Outline drawing of electron tube type 8590.
6
For Parts Inquires call Parts Hangar, Inc (727) 493-0744
© Copyright 2015 Integrated Publishing, Inc.
A Service Disabled Veteran Owned Small Business